While there are a lot of ways to create a portable grill, not all of them are really that practical.
Some are too small to cook decent amounts of food while others are too bulky or heavy to transport easily. However, there is one trick that may be useful in the field, and it can cook enough food for one or two people under most circumstances.
Take a look at the steps below and see how easy it is to make your own Portable Pocket Grill.
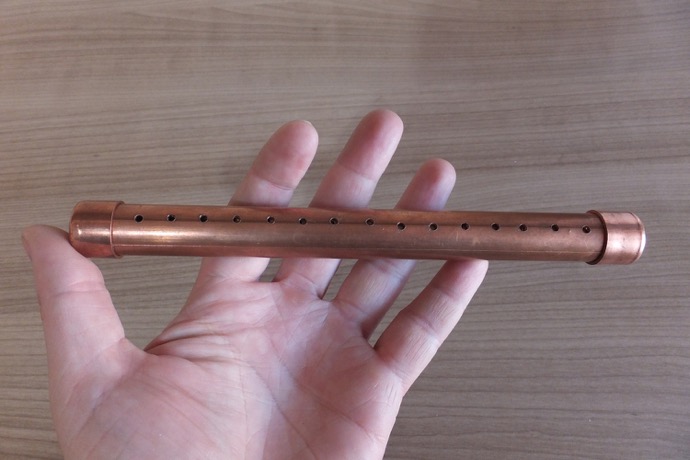
Required Items: You want to use two pieces of copper tubing that are around a foot long. One should be wider than the other so they can slide over each other when stored. They also need to be thick enough to store the rack components which you will prepare in the following steps. Try to make the pipes at least ¾ inch thick. You can use shorter or longer tubes as desired, but keep in mind that shorter tubing will translate into a smaller grill later.

You will also need about 10-12 bicycle spokes and two end caps for the tubes. You will also need a drill, appropriate-sized bit, hacksaw, file or sandpaper, a knife, ruler and a pair of cutting pliers.

Preparing the Tubes

The first step is to decide how long you want your tubes. Cut each one to size and sand or file down the rough edges. Next, take a bicycle spoke and measure its diameter and choose the corresponding drill bit. Then, mark holes about ¾ to an inch apart along one side of each of the tubes. Make sure that the holes on each of the tubes are aligned properly so they will be perfectly parallel once set up.
Drill the holes into each tube and sand down the surface to remove any burrs or shards that may remain.
Preparing the Spokes

Carefully measure and mark the spokes so they will be just a little bit shorter than the tubes. This will allow you to store them inside when the grill is not in use. Cut them down to size with the pliers or hacksaw and sand down the ends. They don’t have to be perfect, but the ends need to be intact enough to slide into the holes that you’ve made in the tubes. The spokes should be uniform in length to ensure that they won’t cause the grill to deform later. Shorter or longer spokes can also cause some of the others to fall out while grilling as well.

All you need to do now is attach the spokes to either side of the grill and you’re good to go. They may be difficult to insert the first couple of times, but it will get easier as the holes are shaped. Try to make the spokes long enough so they stick inside the holes and reach the opposite side of each tube. This will provide a better and more durable fit.

You should seal off one of the end caps to serve as a base and keep the other loose but snug. You can either use a rubber or plastic cap or a metallic one as well. Crimp the metal cap slightly on the removable end so that it will make a secure fit.

Feel free to experiment and modify this trick as necessary. However, following these guidelines will give you a lightweight, durable and practical grill that you can put in your back pocket if necessary. Try it for yourself and see how this little tool can be the perfect addition to your bug out bag, survival kit or backpack.
