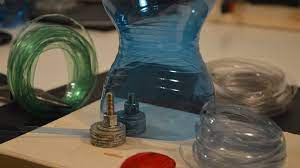
One of the most interesting uses for old plastic bottles is that they can be cut into thin strips of thread that can be used for a million different purposes. The problem is that fashioning a cutter tends to be easier said than done. However, there is a way that you can create a rudimentary cutter without investing in a lot of time or expense with some items that you probably already have laying around. Take a look at the amazing DIY video now!
Required Items
All you need is a rectangular block of wood, a razor blade (preferably one designed to cut paper), four phillips head screws and a couple of brackets that can hold the blade in place once it is attached to the wood. You will also need a hacksaw or similar blade that can cut narrow slits deep into the block of wood.
Getting Started
The first step is to find the appropriate size block of wood to work with. You want one that is long enough to hold in your hand or anchor to a base while being wide enough to hold the bottle and blades. Aim for a piece that is at least two inches wide and eight inches long.
The first step is to cut two slits near the top of the wood block. You want to make a vertical cut that is about an inch long and a horizontal cut that will extend about a third of the way through the wood. Make the cuts so they form the shape of a cross with the vertical cut extending slightly beyond the horizontal one. The important thing to remember is that you need the slits to be wide enough to hold the blade and bottle once the assembly is complete.
The next step is to take the brackets or anchor pieces and place them vertically over the horizontal cut. You want them to be centered so that the horizontal cut crosses through the middle of the brackets. You can use any metallic material for the brackets as long as they are about ½ inch thick and an inch long. Poke starter holes on the top and bottom of each bracket and then insert and tighten the screws.
You only need to do this on one side of the block of wood, and these brackets are designed to anchor the blade in place.
Place the blade into the horizontal cut with the sharp edge sticking out of the side of the block opposite the brackets. You will probably need to gently tap the blade into the slit so that the back side will rest against the brackets. You want about between a quarter and third of the blade to stick out from the side of the block.
Using the Cutter
All you need to do now is cut off the top or bottom of the plastic bottle below the point where it begins to taper. Place the cut end of the bottle into the vertical slit. Hold the cutter with one hand while you gently but firmly turn the bottle against the blade. This will cut the plastic into narrow strips as you turn the bottle.
To adjust the thickness of the strips, angle the bottle slightly towards the blade. The bigger the angle, the wider the strips. Reduce the angle of the bottle to create narrower strips. Keep repeating the twisting motion until you have cut the desired amount of plastic. Coil, bend or spool the plastic wire for future use and store accordingly.
For larger projects, you can also anchor the block vertically on a piece of plywood so you don’t have to hold it in your hand as you are cutting. Simply screw some flat head screws through the bottom of the plywood and into the block to hold it in place. You can also use nails, but the screws will provide a stronger connection.
Try this trick for yourself and see how easy it is to turn discarded plastic bottles into a virtually unlimited supply of cordage. This simple design can turn out to be a very beneficial tool out in the field or during a situation where supplies are scarce.
