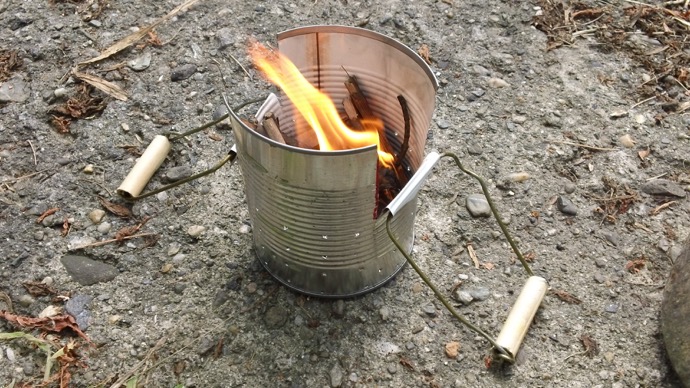
You can take an empty can and create an effective, but simple camping stove with a handle in a few steps. It is portable, durable and the handle makes the can safer than a typical rocket stove. Check out the following steps and see how easy it is to make your own with some common items that you probably already have on hand.
Required Items
1 number 10 can
2 wire coat hangers with the cardboard tubing attached

1 nail
Hammer
Marker
Ruler
Pair of scissors
Needle nose pliers
Wire cutter
Towel

Cleaning and Freezing the Can
The first step is to remove any labels and thoroughly clean and rinse the inside of the can. Cut off the top lid if it is attached and remove any sharp edges. Rinse again and fill with water. Place the can in the freezer until the water turns into ice. This will make the can more sturdy and easier to work with later on.
Preparing the Handles

You can work on the handles while you are waiting for the can to finish. Take your hangars, remove the cardboard tubing (set aside for later) and unwind the wire. Get it as straight as possible. A good rule of thumb is that you want each length of wire to be about 2 ½ times the height of the can. Mark this area with your marker and cut.
The next step is to take your pliers and use them to bend the wire of each handle into the shape of a rectangle. Make sure that you decide on the width of each handle before bending, and mark these spots with your marker. Fashion the wire so that the straight part (the one the tubing was over) makes the hand grip and sides of the handle.
Take the cardboard tubing and cut it into two pieces that represent the dimensions of your handle minus about ½ of an inch. You want the tubing to be a little bit shorter than the handle so that it can move freely when gripped.
Preparing the Can

Once the water is completely frozen, remove the can with your towel in order to prevent your fingers from sticking to the metal. Lay the towel on your work surface and place the can on its side. Take your hammer and nail and start pounding in vent holes throughout the bottom portion of the can. Make a series of at least 3 rows that are about an inch apart horizontally and vertically, but you can choose a different pattern if you like. You can also use a drill or even a phillips screwdriver and hammer to make bigger holes as well.

Remove the ice from the can once you’ve made the holes. The easiest thing to do is run it under some water and tap out the underside until the block of ice falls free.

The next step is to mark two lines that represent a 2 x 2 section that extends from the top rim of the can downward.

Take your shears or scissors and cut two lines. Repeat for the opposite side of the can.

Then, use your pliers to fold these metal flaps around the handles in order to secure them in place.
You can make the size of the folds as big or as small as you want as long as there is freedom of motion with the handle when you are finished.

Now, all you need to do is put some kindling or charcoal into the can and start your fire. Place your pan or pot on top, and you now have a fully-functional portable stove.
Try this out for yourself, and feel free to experiment with different sized cans or other modifications that will help to tailor it to your particular needs.
